Instant Pot Hamburger Stew: A Hearty Throwback with a Modern Twist
There’s something timeless and comforting about a hot bowl of stew—something that instantly brings to mind crisp fall afternoons, family dinners, and the warmth of home-cooked meals from generations past. Our Instant Pot Hamburger Stew taps into that deep emotional core of American culinary culture, marrying the hearty traditions of rustic beef stews with the practicality and speed of modern electric pressure cooking. It’s more than just a recipe—it’s the story of how comfort food evolves while retaining its soul.
The roots of hamburger stew trace back to the resourceful kitchens of mid-20th-century America, when home cooks sought affordable and satisfying meals to feed growing families. Ground beef—affectionately known as “hamburger” by many—was a staple ingredient. Cheaper and quicker to cook than tougher cuts of beef used in traditional stews, it became a weeknight hero. Combined with basic vegetables and broth, it formed the foundation of what we now recognize as hamburger stew: simple, humble, and endlessly customizable.
But while stovetop versions of hamburger stew are beloved for their slow-simmered taste, they can take upwards of an hour or more to prepare from start to finish. That’s where the Instant Pot steps in—not to replace tradition, but to carry it forward into the busy realities of modern home kitchens. With this recipe, you can enjoy all the depth of flavor and heartiness you expect from a stew in under an hour, most of which is hands-off.
The beauty of this Instant Pot Hamburger Stew lies in its simplicity and the smart layering of flavors. It starts, as all good stews do, with aromatics—in this case, sautéed onion and garlic—which form a flavor base that perfumes the entire dish. From there, lean ground beef is browned, giving the stew its signature richness and a savory backbone. A touch of tomato paste is stirred in next to enhance umami—a small step with a big payoff.
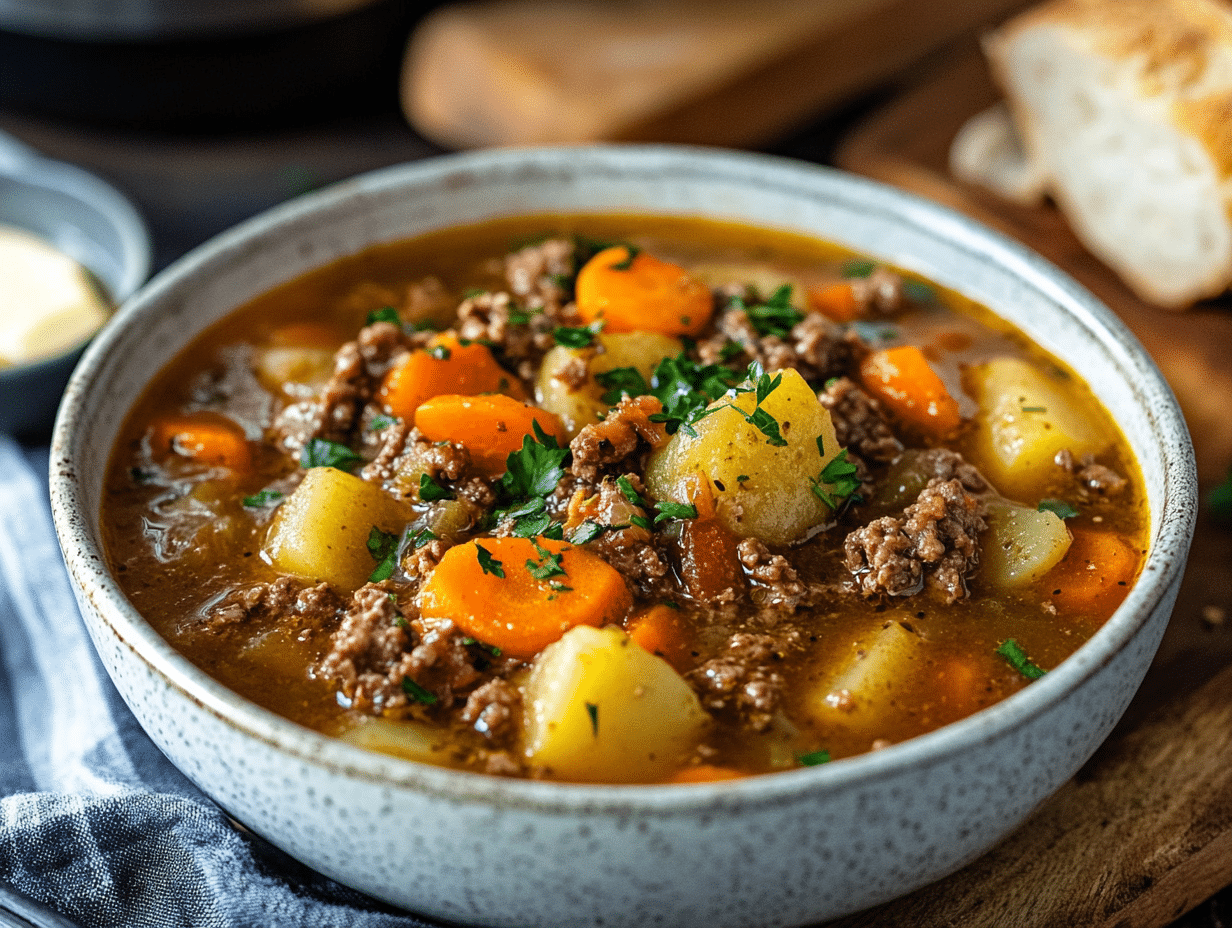
The wholesome mix of vegetables—potatoes, carrots, celery—adds earthiness, texture, and nutrition, while a can of diced tomatoes gives the stew both brightness and body. Herbs like dried thyme and black pepper bring subtle complexity, while beef broth provides the savory canvas on which all the ingredients mingle and deepen in the pressure cooking process.
The Instant Pot not only dramatically reduces cooking time but also builds flavor fast. By locking in pressure and heat, it tenderizes vegetables and melds the ingredients beautifully in just 10 minutes of active cooking. You’ll be amazed at how deeply flavorful this stew becomes in such a short time—a credit to both the appliance and the balanced recipe.
The idea for this dish actually emerged as a nostalgic nod to my grandmother’s cabbage soup—a cozy, slow-cooked dish that was rich in vegetables and warmth. I loved the texture and depth of her soup, but I wanted to adapt those comforting elements into something meatier and more weeknight-friendly, something with the same warmth but a richer profile. Thus, the Instant Pot Hamburger Stew was born—not a replica, but a generous reinterpretation, using ground beef instead of cabbage and a smarter, faster cooking method.
This stew is also delightfully adaptable. Want to make it even heartier? Stir in frozen peas or green beans after pressure cooking—the residual heat will soften them perfectly. Looking for a deeper savoriness? A splash of red wine or a dash of Worcestershire sauce before sealing the pot goes a long way. You can even make it gluten-free by choosing appropriate broth and tomato paste—this is a dish that suits many dietary needs without compromising on taste or satisfaction.
One of the major wins here is cleanup. Because everything is cooked in a single pot, from sautéing aromatics to simmering down the broth, there’s minimal mess—just a single insert to clean. It’s ideal for busy families or anyone who wants a nourishing dinner without the usual pile of pots and pans.
The stew yields about six generous bowls—perfect for feeding a family, or for meal prepping lunches for the week. It also makes terrific leftovers, as the flavors continue to develop even after cooking. Just reheat gently on the stove or in the microwave, and it’s as good (if not better!) the next day.
In short, Instant Pot Hamburger Stew is more than just a quick meal—it’s a bridge between past and present, tradition and convenience. It retains the comforting, homemade feel of stews cooked slowly on the stovetop, while embracing the speed and practicality of pressure cooking. With nourishing ingredients, bold flavor, and minimal fuss, it’s the kind of recipe that becomes a regular rotation in your kitchen—no matter how busy life gets.
Whether you’re seeking warm reminders of your childhood or simply need a filling, wholesome dinner on the table fast, this Instant Pot Hamburger Stew delivers. It’s comfort food, reinvented—with love, memory, and a dash of modern magic.

Instant Pot Hamburger Stew
Ingredients
- 1 pound lean ground beef 85% lean recommended for best flavor and less grease
- 1 medium yellow onion diced finely
- 2 cloves garlic minced
- 2 cups russet potatoes peeled and cut into 1/2-inch cubes
- 2 cups carrots peeled and sliced into 1/4-inch coins
- 1 cup celery thinly sliced
- 1 can diced tomatoes 14.5 oz, with juices
- 4 cups beef broth preferably low sodium
- 2 tablespoons tomato paste
- 1 teaspoon dried thyme
- 1 teaspoon kosher salt plus more to taste
- ½ teaspoon freshly ground black pepper
- 2 tablespoons olive oil extra virgin
Instructions
- Set your Instant Pot to ‘Sauté’ mode and add the olive oil. Once hot, add the diced onions and sauté for about 3–4 minutes until they become translucent and fragrant.
- Add the minced garlic and sauté for another 30 seconds, stirring constantly to prevent burning.
- Add the ground beef to the pot, breaking it into small pieces with a wooden spoon. Cook until browned, about 5–6 minutes. Drain excess fat if necessary.
- Stir in tomato paste, mixing it thoroughly into the beef mixture to enhance the stew’s depth of flavor.
- Add the potatoes, carrots, celery, diced tomatoes (with juices), beef broth, thyme, salt, and pepper. Stir to combine well, scraping up any browned bits from the bottom to avoid a burn warning.
- Lock the Instant Pot lid and set the valve to ‘Sealing’. Pressure cook on ‘High’ for 10 minutes. It will take about 10 minutes to come to pressure before cooking begins.
- Once cooking time is complete, allow natural pressure release for 10 minutes, then use quick release for any remaining pressure.
- Stir well and taste for seasoning. Adjust with additional salt or pepper if needed. Serve hot.
Notes
- Flavor Boost: For deeper flavor, stir in a teaspoon of Worcestershire sauce or a splash of red wine before pressure cooking.
- Make it hearty: Add 1/2 cup of frozen peas after pressure cooking, letting the residual heat cook them until tender.
- Gluten-Free: Ensure the broth and tomato paste are certified gluten-free.